Precision luthier tools. Made in Virginia, USA. Lifetime Warranty.


Share
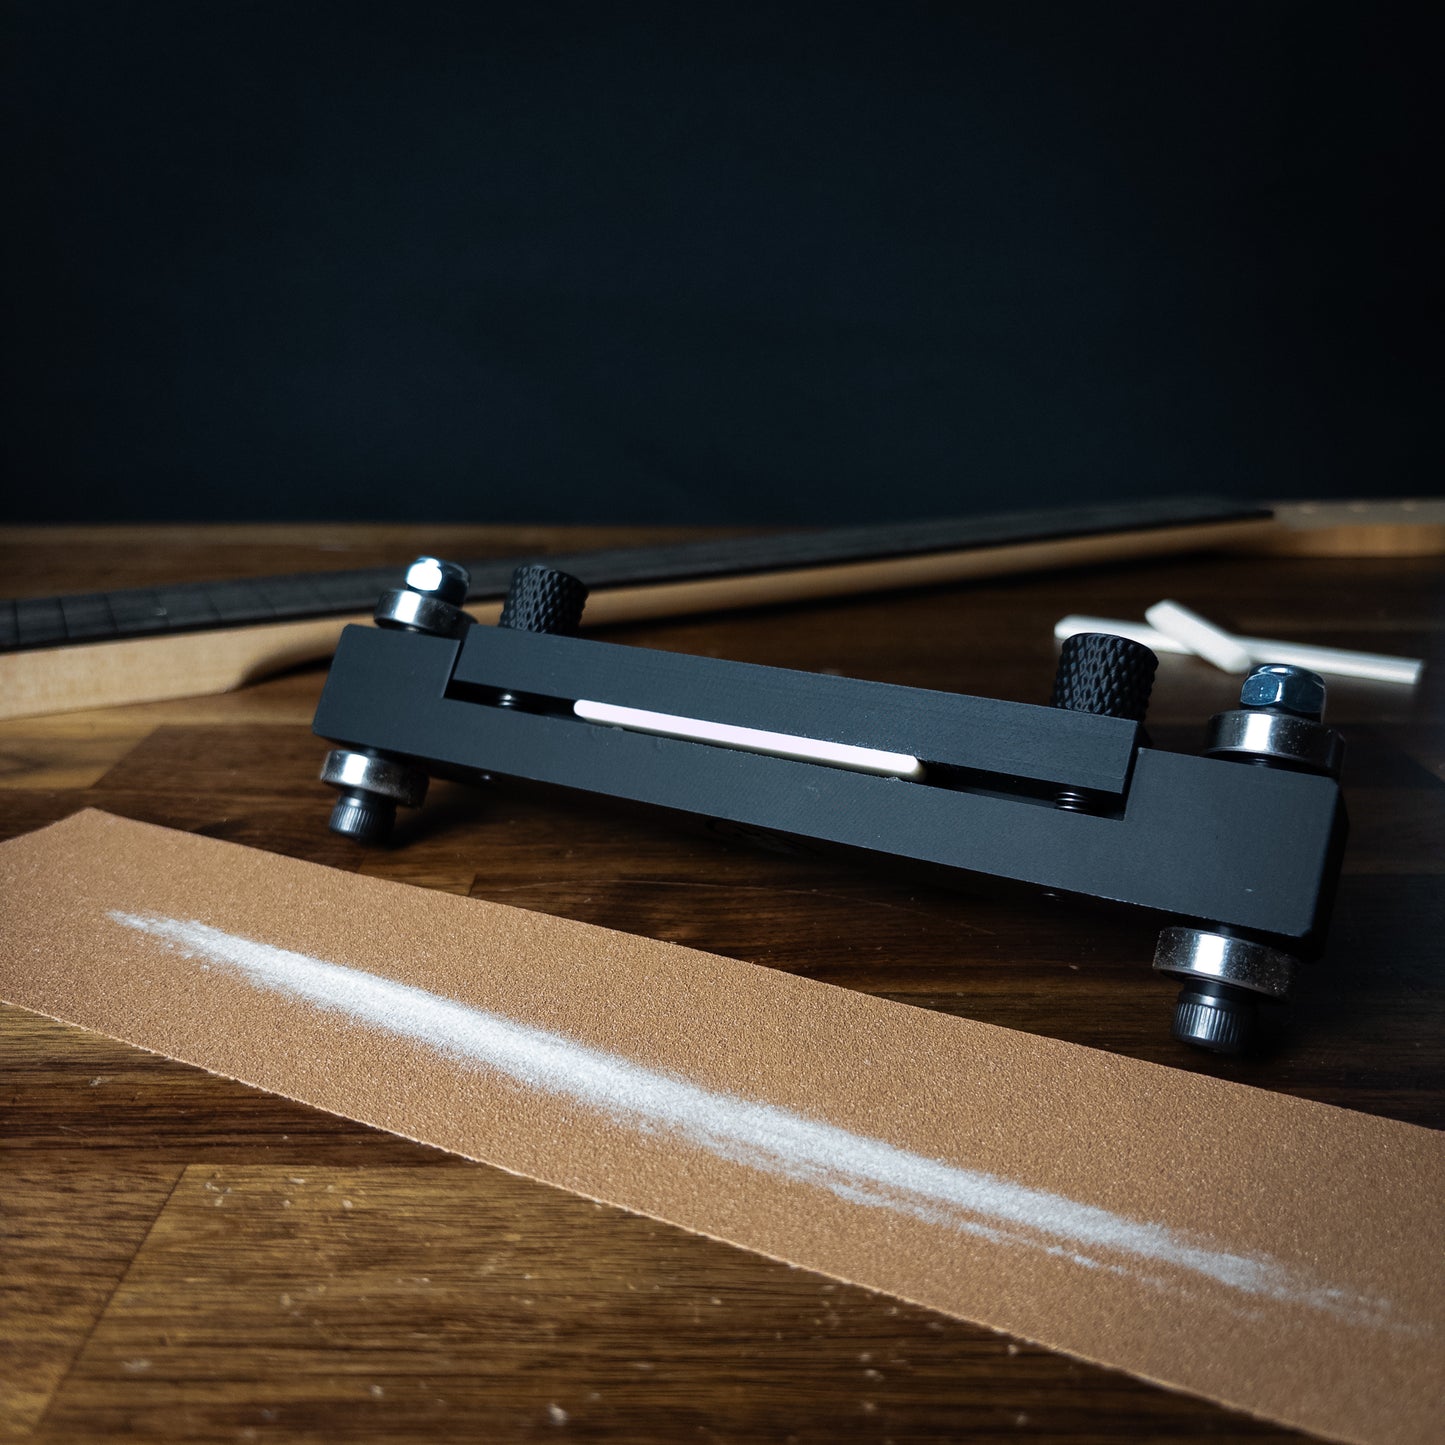
Nut & Saddle Sander
Nut & Saddle Sander
Dead-flat, perfectly square nut and saddle sanding every time.
Keeps nuts and saddles perfectly square
Eliminates guesswork in final height
"This sander has completely changed my efficiency in both time and accuracy when fabricating nuts and saddles" - Brent Gable of Gable Guitars
Couldn't load pickup availability
Proudly designed and made by a small team of builders in Virginia, USA
Ships in 2-3 Days
Why Luthiers Love It:
- Keeps nuts and saddles perfectly square
- Eliminates guesswork in final height
- Prevents tilt and uneven sanding
- Delivers repeatable, flat results
- Locks settings so nothing drifts mid-sand


Collapsible content
Key Features
- Adjustable Knobs with Thumb Screws: Easily control sanding depth and angle. Plus, thumb screws lock the knobs, preventing any unwanted movement during nut sanding.
- Increment Lines: Each line indicates 0.1 mm of projection (approximately .0039"), providing a precise reference for workpiece extension from the sander base.
- Tapered Springs for Easy Setup: The spring-loaded clamp stays open, allowing quick installation of nuts or saddles. Therefore, it accommodates piecesup to 14 mm thick and 111 mm wide, making it ideal for various needs.
- Material: PLA
- Reinforced Clamp Stability: Two embedded steel rods prevent flex when tightening the clamp, keeping the workpiece secure and aligned.
How to Use
- Prepare Your Sanding Surface: First, place adhesive sandpaper on a flat
surface to create a smooth base. - Insert the Nut or Saddle: Next, place the nut or saddle in the spring-loaded jaw and tighten it securely. The tapered springs keep the clamp open, which makes setup quick and easy.
- Adjust the Height: Then, use the closer holes for nuts and the wider holes for saddles. Adjust the height with the knobs to set your preferred depth.
- Start Sanding: Finally, place the tool on the sandpaper and move it gently. When the wheels begin to turn, you’ve reached your preset height, achieving an even, flat nut sanding.
works great! great tool!
Great tool! It is a pleasure to ue!
Very precise and sturdy tool. Worked perfectly!
Seems to work really well. This was my first time using this sander so I had a bit of difficulty getting the saddle positioned/secured but once I did it worked great. Any recommendations on methods to ensure positioning and securing the saddle prior to making your depth adjustment would be greatly appreciated. But the product itself worked great once I got the saddle aligned properly. Thanks!
Excellent tool at a great price point. Extremely accurate and easy to use and setup. Thanks!!